3.1. Base API Security Policy
If you want to skip configuration section and use prebuilt objects proceed to policy binding. Keep in mind, you will have to use objects with prebuilt suffix.
3.1.1. Create a new Application Security Policy
In this task, you will create a Rapid deployment new application security policy.
- Log into TMUI
- Create new Application Security policy (Security -> Application Security -> Security Policies).
- Define the policy name “API_Security_Policy”
- Switch into Advanced mode on the top right corner. Select policy template in the dropdown menu - Rapid Deployment Policy
- Select Virtual Server in the dropdown menu - api.vlab.f5demo.com
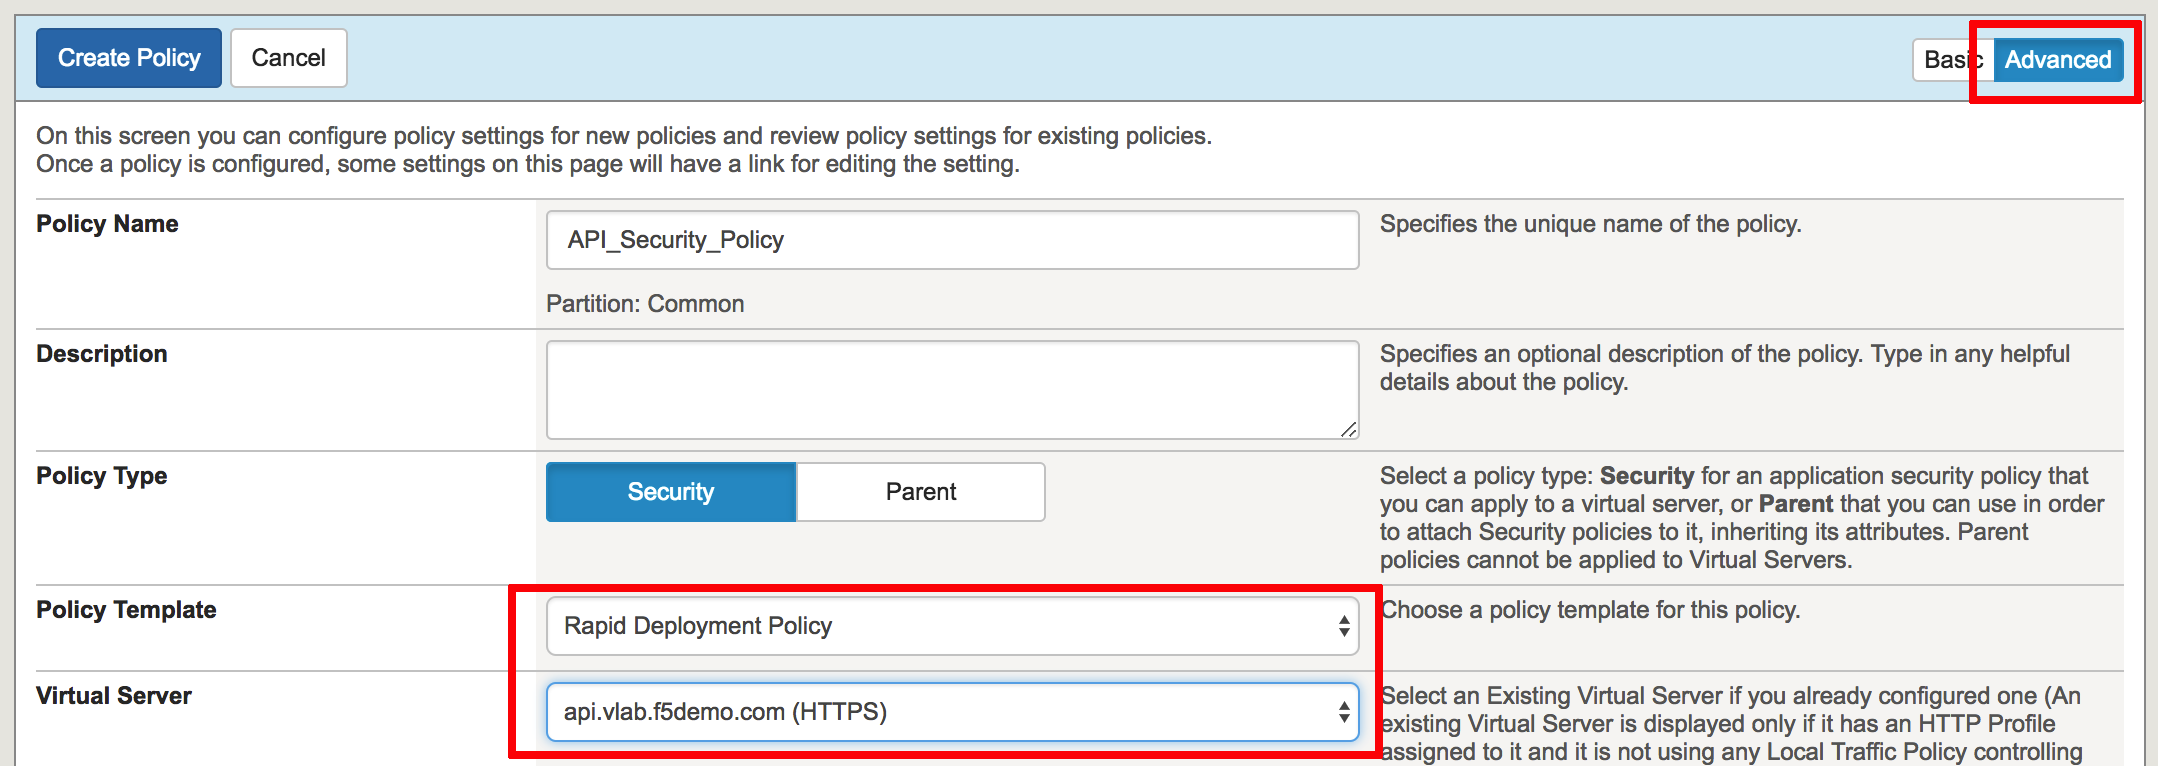
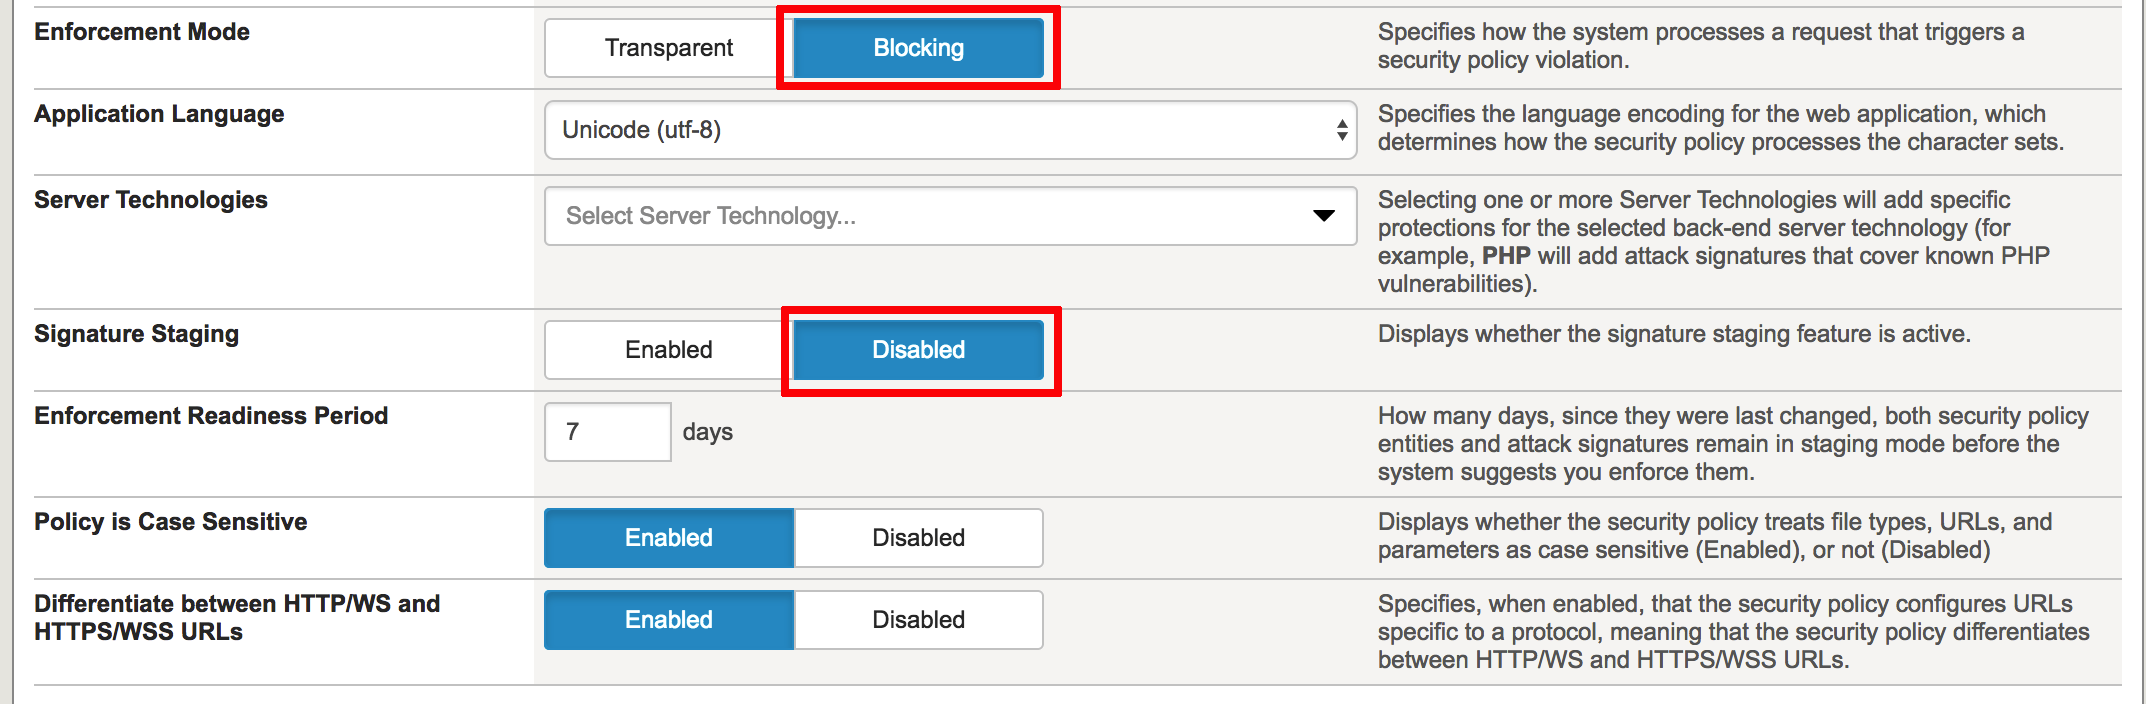
- Change Enforcement Mode into Blocking and Signature Staging into Disabled. Make sure “Policy is Case Sensitive” and “Differentiate between HTTP/WS and HTTPS/WSS URLs” are set to Enabled
- Click Create Policy in the upper left corner. The policy will be created and assigned to Virtual Server
3.1.2. Create custom response for API Security
In this task you will create response action when triggered API Security policy violation.
- Navigate to response page (Security -> Application Security -> Policy -> Response Pages).
- Select Custom Response in the Response Type dropdown menu. Replace default response in Response Body with Attack detected, support ID: <%TS.request.ID()%>
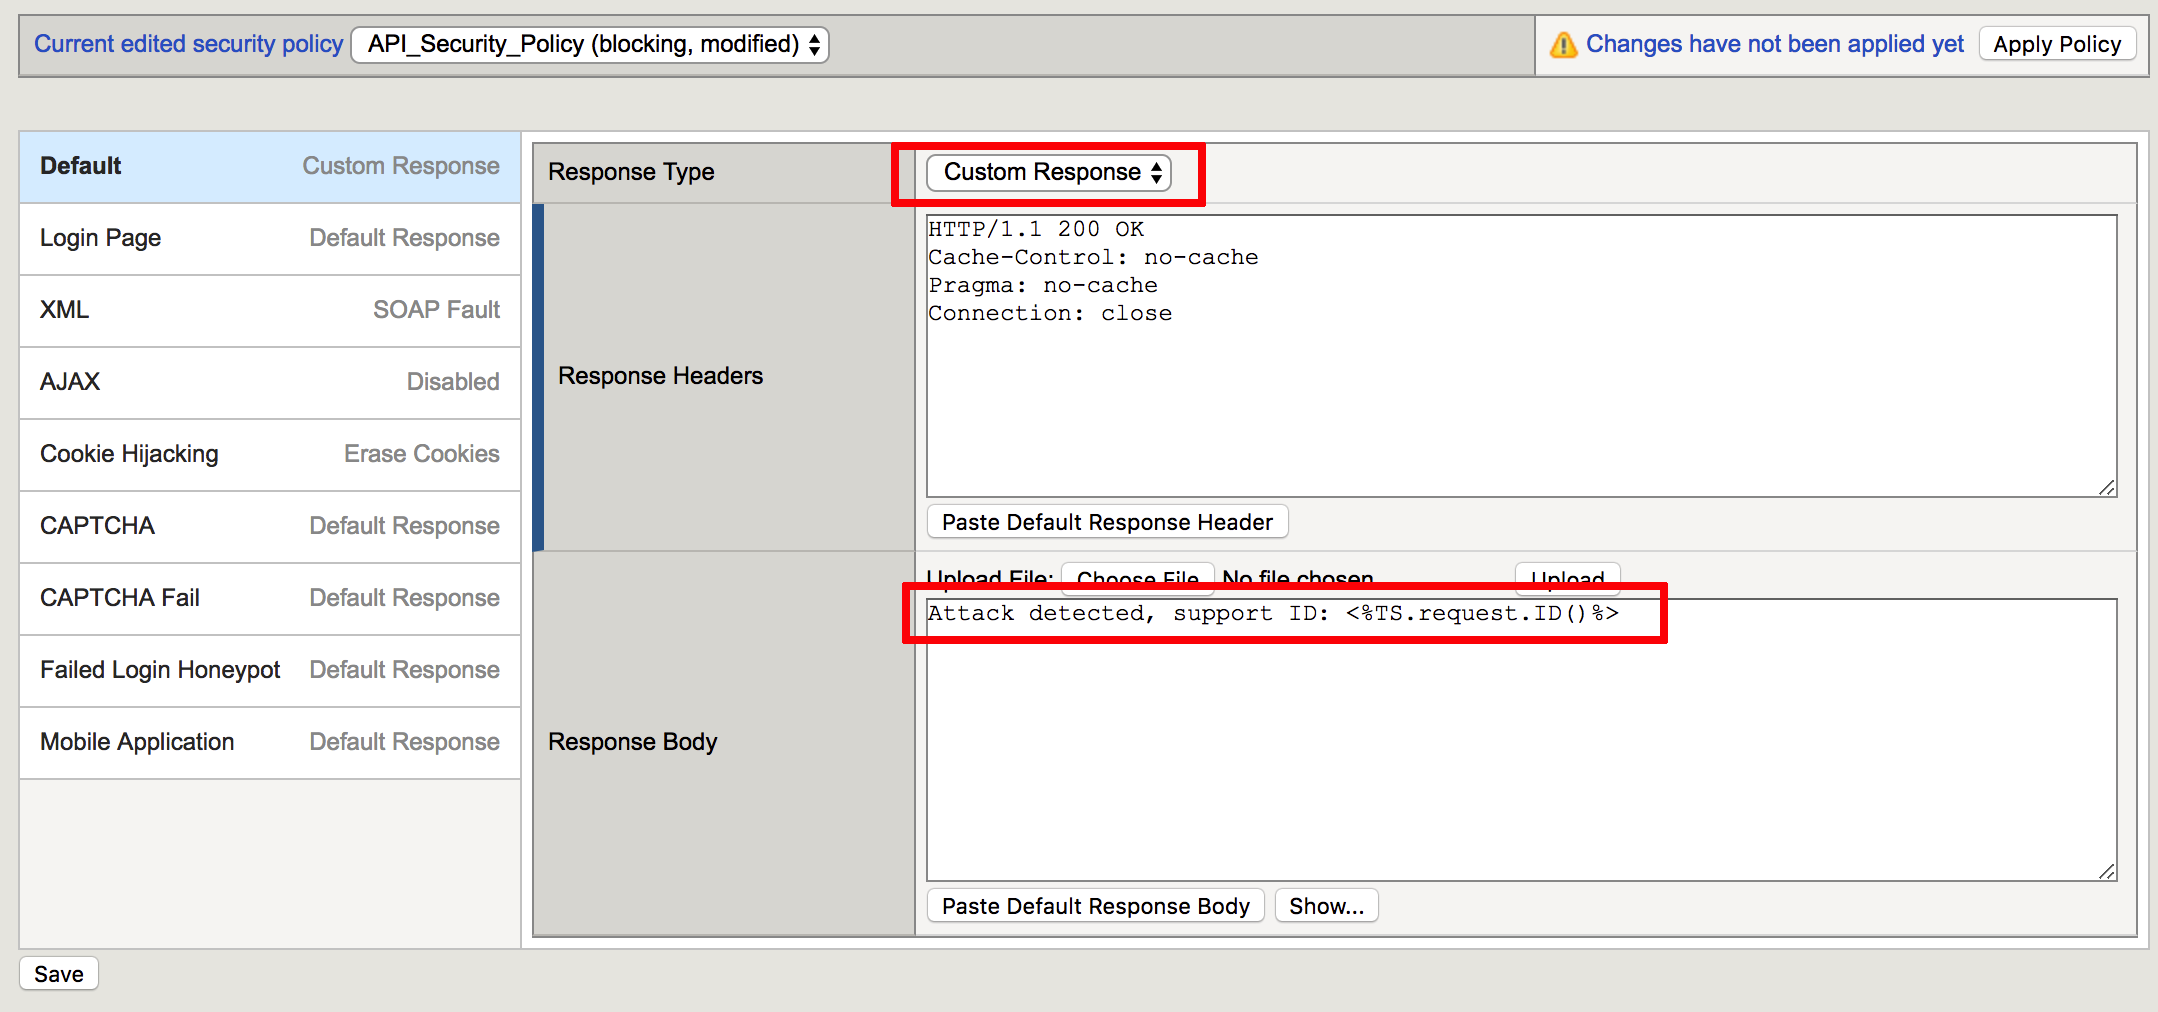
- Click Save
3.1.3. Create JSON profile for API Security
In this task you will create JSON profile which will be used in API security policy.
- Navigate to Security -> Application Security -> Content Profiles -> JSON Profiles and click Create
- Specify profile name API_LAB_JSON and Maximum Value Length 20 bytes, other settings should remain default
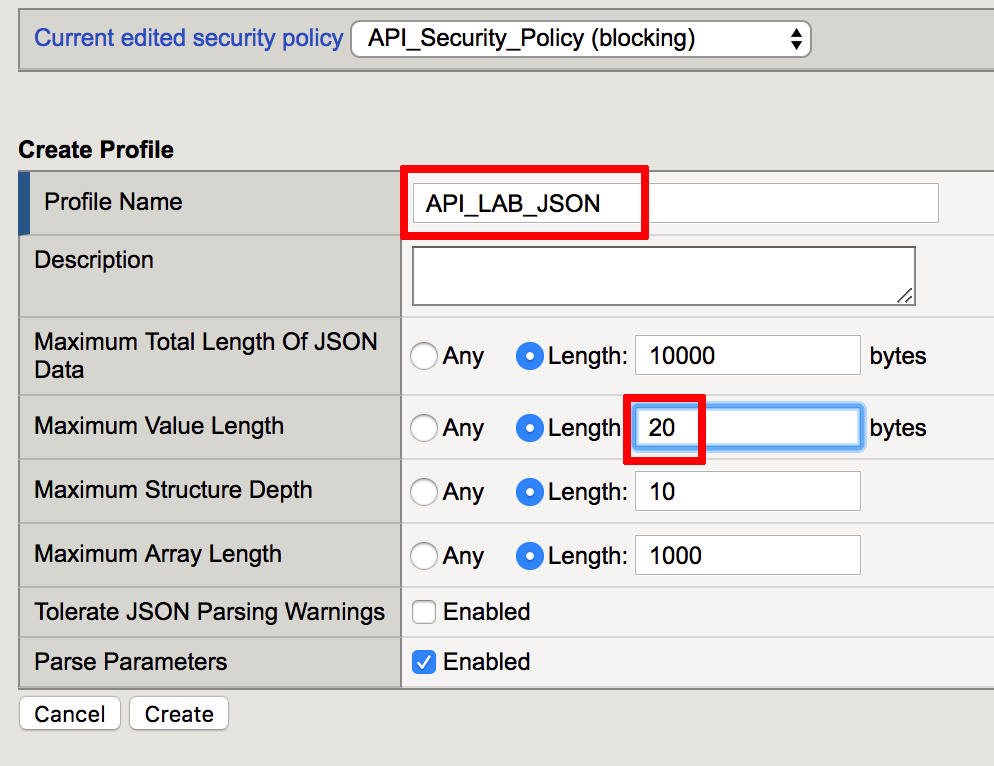
- Click Create
- Click on Apply Policy
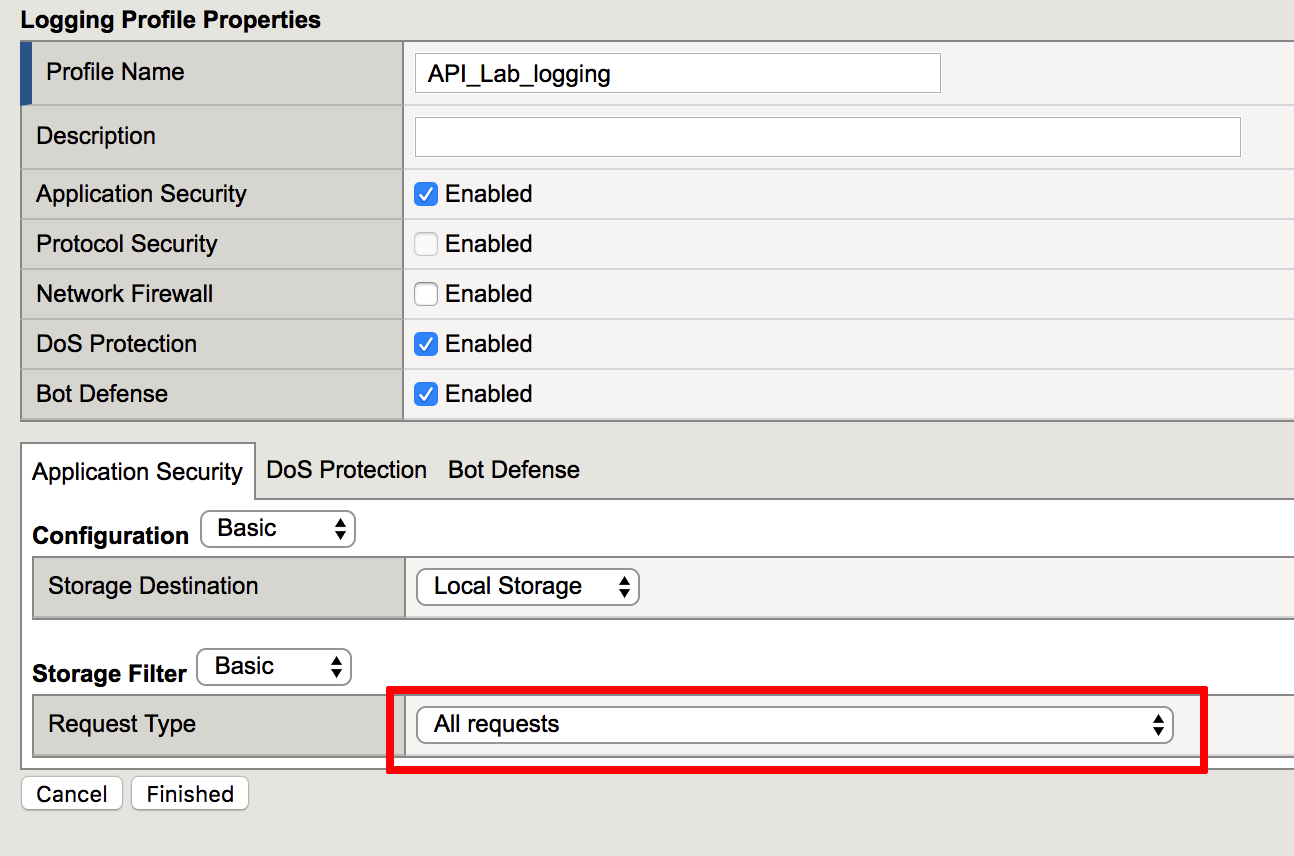
3.1.4. Create a new Logging profile
In this task, you will create a logging profile to log all requests.
- Create logging profile (Security -> Event Logs -> Logging Profiles). Define a name API_Lab_logging and set checkboxes for Application Security, DoS Prevention and Bot Defense
- On the Application Security tab for the Request Type select All requests
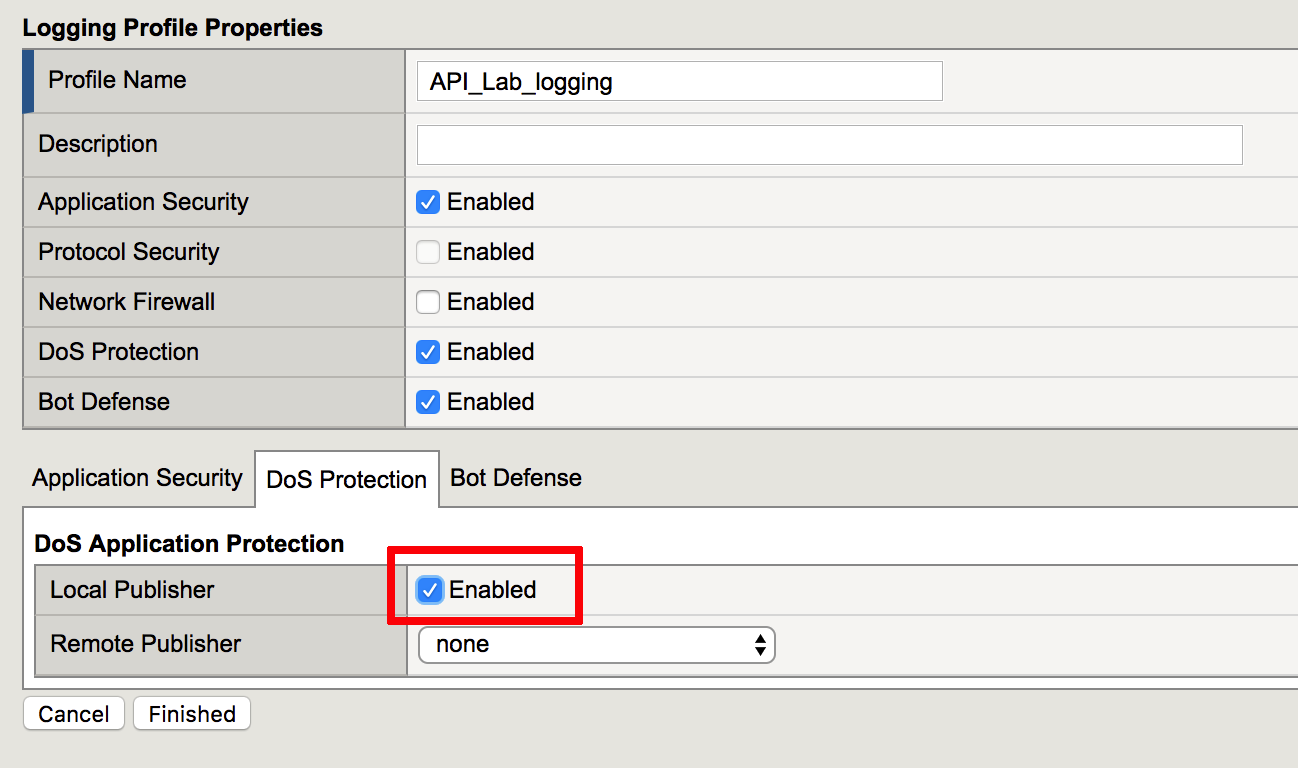
- On the DoS Protection tab set Local Publisher into Enabled
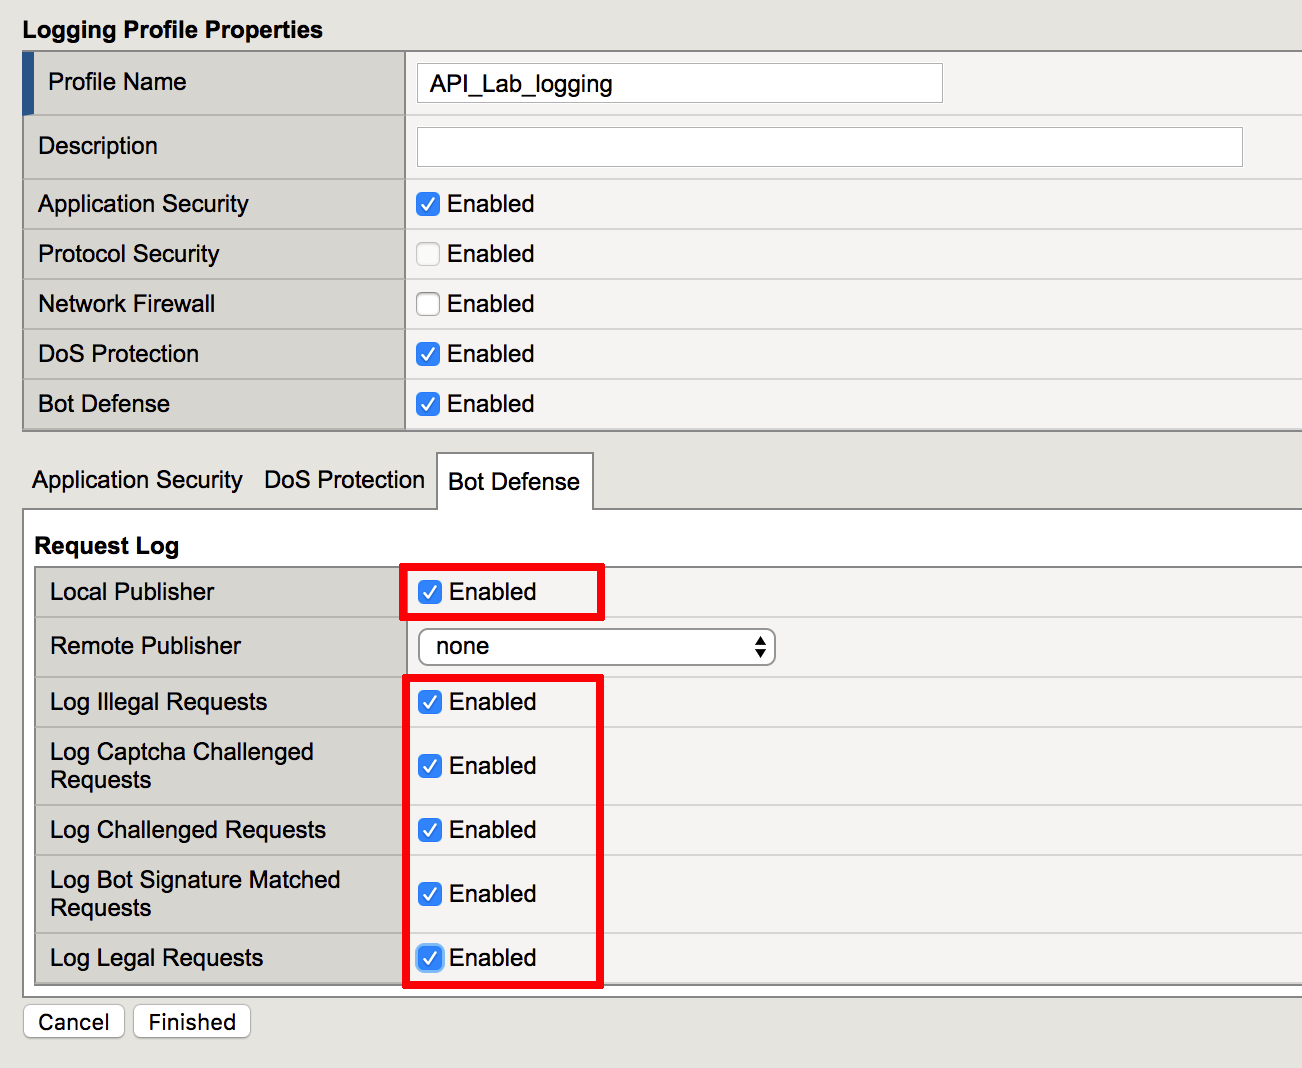
- On the Bot Defense tab set to Enabled all available options as per screenshot below.
- Click Finished
3.1.5. Binding
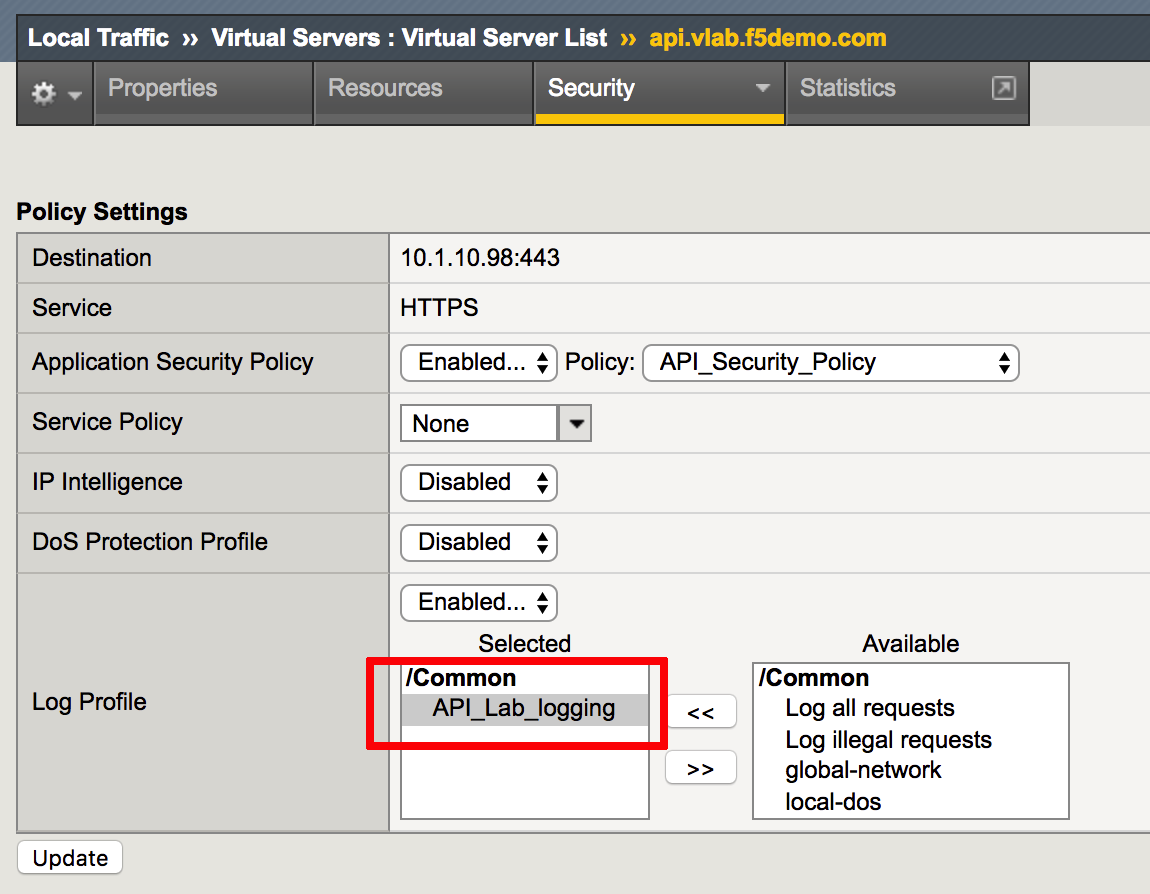
- Apply the “API_Lab_Logging” profile to the virtual server. Navigate to Local Traffic => Virtual Servers => Virtual Server List, select api.vlab.f5demo.com and click the Security tab and move in Log profile API_Lab_Logging to selected.
Note
If you are using prebuilt objects, make sure you enable Application Security Policy and specify the policy prebuilt_API_Security_Policy
- Click Update.